 Here in Texas, we often have fire bans spread throughout the state by county, due to our natural seasonally dry conditions. This is true even in parks with developed campgrounds. Some parks and facilities may even ban charcoal fires while others might not, so make sure you check before you go. You might want to consider having a propane option like the Big Red Campfire, or its smaller version Little Red Campfire, as a backup!
If there are no fire bans in the area make sure to build campfires in fire rings or designated spots only.
We always want to practice Leave No Trace principles and observe the 50-mile firewood rule. This means we should be using local firewood only. You can get firewood from nearby stores, and sometimes campground hosts offer bundles of firewood or kindling for sale. If you’re traveing from more than 50 miles away do not bring firewood. Campgrounds sometimes also ban bring-your-own firewood completely. This is to avoid introducing invasive insects to the area or forest.
Know Before you Go Summary:
- Check with the park, land managers or local government for campfire regulations in the area where you plan to camp.
- Build fires in designated fire rings only.
- Always follow Leave No Trace guidelines.
- Observe the 50-mile rule for firewood

Helpful tools: Knife and Matches or Lighter.
Bonus tools: Saw, Hatchet, for sawing and splitting small logs. This is important if the wood is wet to be able to get at the dry heartwood inside.
Bonus, bonus tools: Firestarters!
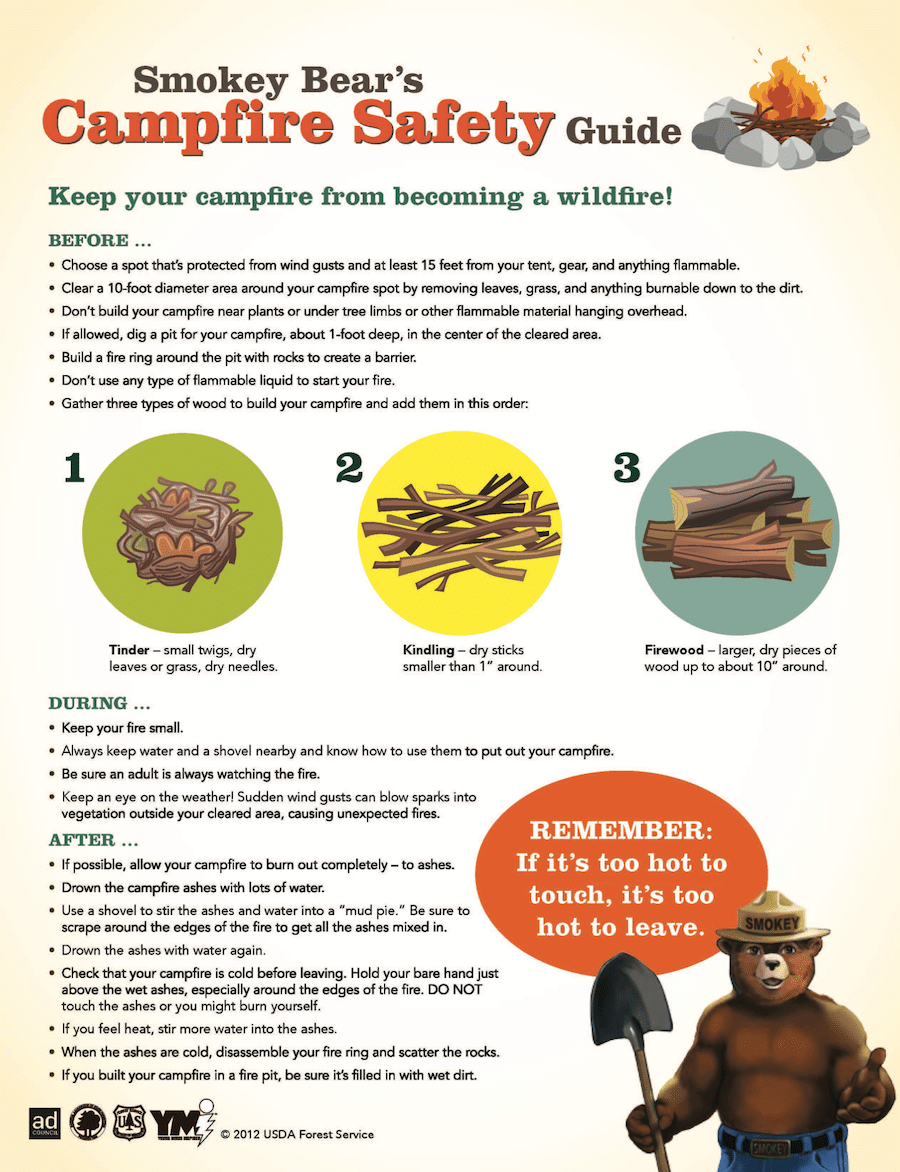
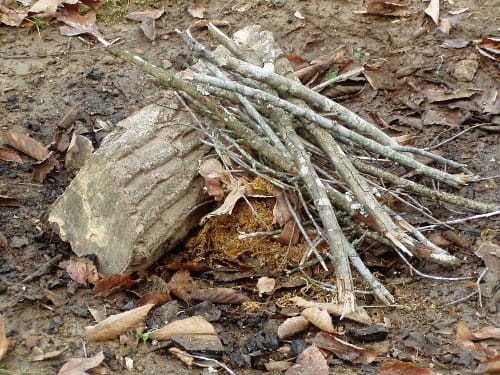
You’ll need three categories of fuel: tinder, kindling and firewood.

- Tinder includes small twigs, dry leaves, wood shavings, pine needles, dry grass, paper, lint, and cotton balls.
- Kindling consists of small sticks, usually less than one inch around
- Firewood is any larger piece of wood and is what will keep your fire going long into the night.
- Have a water source, water bucket, or sand near by. A rake or shovel is also helpful to extinguish the fire.
- Everyone should be a safe distance from the fire, no running or horse playing near the fire!
- Make sure to have hair, clothing or jewelry tied back or tucked in when leaning over, lighting or tending a fire.
- As the fire burns, embers should be moved to the center to burn them completely. Ideally, you should reduce them to white ash.
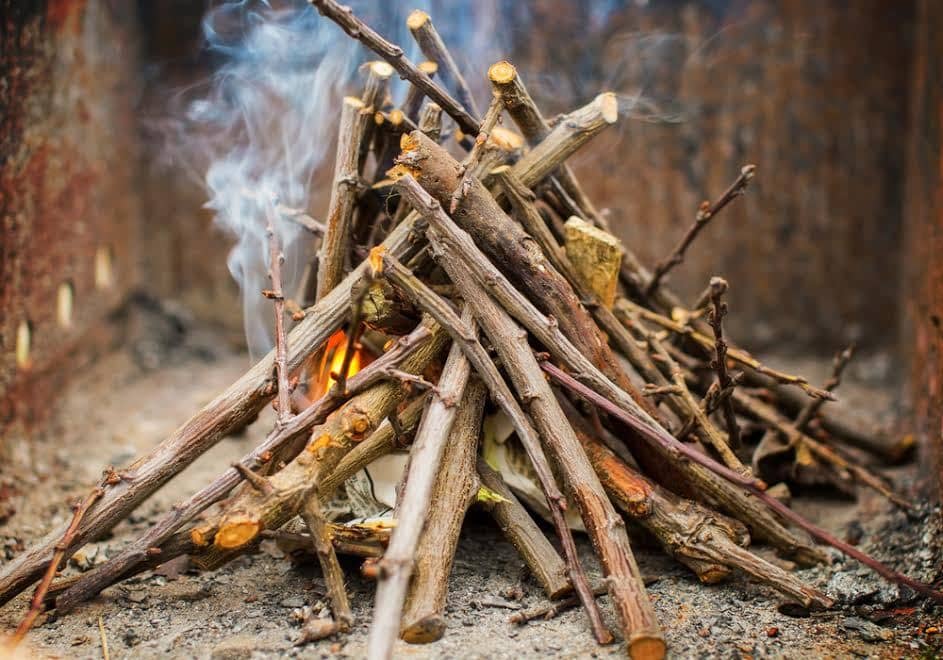
Teepee:
Usually one of the first fire structures that scouts learn. It is easy to learn, great for cooking, and burns steadily for a short amount of time. Works really well with just thinner sticks too.
- Start by placing the tinder bundle into the fire pit.
- Build a cone over the tinder bundle by leaning small pieces of kindling against each other, making sure to leave gaps for air, and a door to light the tinder.
- Build a few more layers on the teepee with larger and larger kindling
- Light the tinder!
Lean-to:
This structure is also very easy, and useful for when you need cover to start a fire in the wind or rain. Good for when you have big logs to burn
- Set up a larger log, or two stacked on each other.
- Place tinder or firestarter close to center of the log(s)
- Lean tinder against the log(s) around the tinder
- Light the tinder!
- Add more fuel as needed.
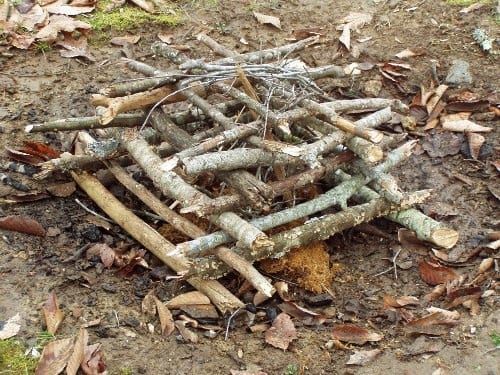
Log-cabin:
This structure is known to put out a very warm and bright fire! It is also considered more of a novelty fire for ceremonies. It can take longer to set up and might require more tools, but can keep burning for hours with no extra work.
- Take your two biggest pieces of firewood and place them on parallel to each other about 3 to 6 inches apart.
- (Optional) Place a few pencil-thin kindling sticks across this first level as a platform for tinder and kindling.
- Take the next two biggest logs and stack them on top of and perpendicular to the first two.
- Continue stacking logs on top of your cabin in sets of two, each set in the opposite direction of the one before it.
- As you start using smaller logs, start placing them closer together, until you’ve built an almost closed roof on top of your log cabin.
- Make sure to place tinder and kindling within the log cabin structure.
- Carefully reach in to the center and light the tinder!

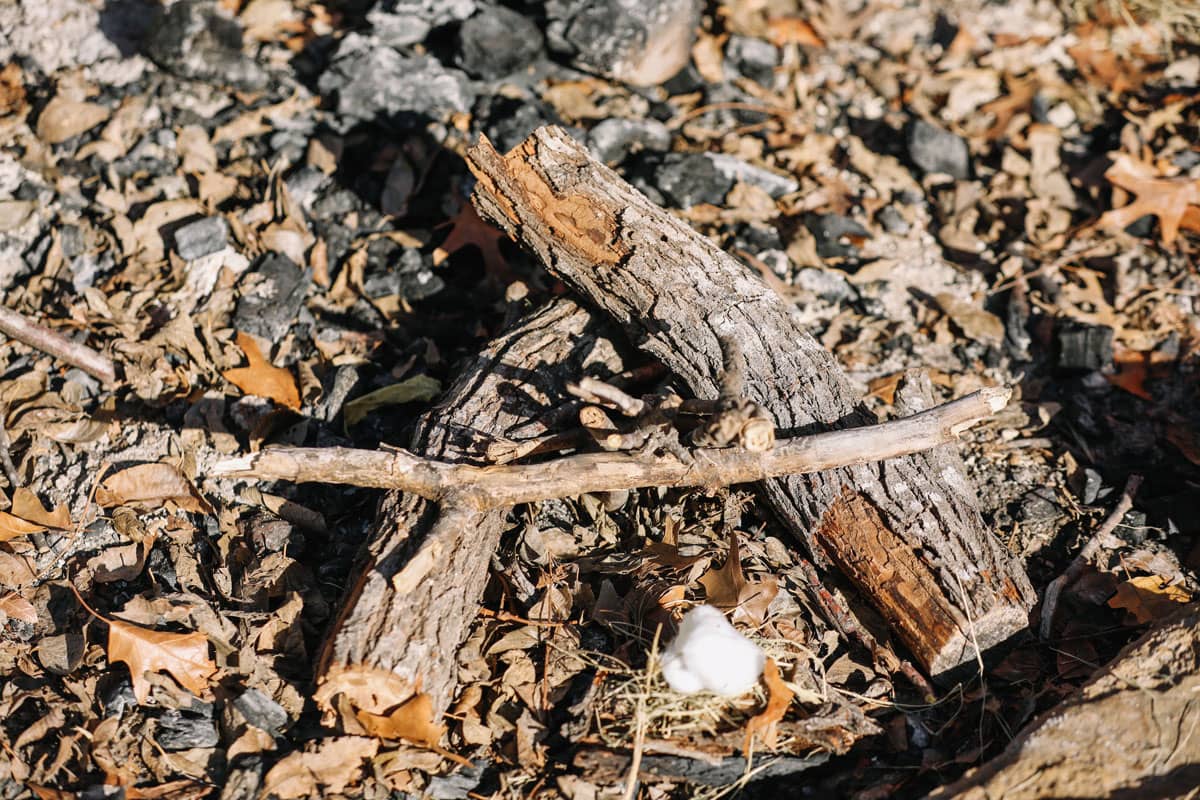 A-Frame Campfire
A-Frame:
Similar to the lean-to, the a-frame is great if you need cover to start a fire in the wind or rain.

- Lay thumb-sized or larger sticks in the shape of an A. If there is a breeze, orient the open end so that the breeze will blow into the A.
- Prop tinder against the crossbar of the A, twigs allowing the breeze to blow under it. Tinder should be piled loose enough to allow air circulation, but close enough to share the flame with each other.
- If using firestarter place below, or on top of tinder. Hold lighted match under the tinder until it catches fire.
- Gradually add more tinder, increasing in size.

You should check with the park or land manager and ask for recommendations and follow any steps they provide. Generally the fire should be completely extinguished with fire.
- Spread out coals in fire ring
- Pour or sprinkle coals with water and stir. (this is where a shovel or rake might come in handy)
- Repeat until coal bed is cool.
- If you have a shovel and water bucket available: Use shovel to lift remaining fuel logs not reduced to ash, and soak in water bucket.
- Then replace on smoothly raked, cool fire bed.
- Hold hand above coals and feel for heat. If it feels warm, continue to sprinkle or repeat the process.
- You should be able to actually touch the coals or logs for 60 seconds and not feel any heat.
NOTE: Do not move logs or coals out of fire ring and use water rather than dirt to put out the fire.
